5.10.2013

Three Bean Salad


While I was visiting my friend Carolyn on Vashon Island, near Seattle, we spent a lovely day on "the watch" (the upper deck) reading, watching the mountain and chatting. Carolyn made this great salad for lunch, a recipe from Mario Batali, and I thought it might be perfect for a birthday party I attended last weekend. I couldn't find the recipe she used at the time, so I just did my best to make a good vinaigrette and added what I remembered from the salad I ate with C. I think this salad is perfect for spring and summer-- filling (lots of protein!), refreshing, and light.


Here's what I put together:

3/4-1 lb green beans, blanched
1 can cannellini beans, drained and rinsed
1 can chickpeas, drained and rinsed
1 cup arugula
1/3 c. toasted pine nuts

2 T olive oil
3 T champagne vinegar
2 T cashews
1 t dijon mustard
1 t honey
1 clove garlic roughly chopped
pinch of stevia or low-cal sweetener (optional)
salt and pepper to taste

3 T sparkling water


Blanching: Bring a pot of water to a boil and prepare a large bowl of ice water. Remove tips from the beans. Add some salt to the boiling water, and add the green beans. Boil for 3-4 minutes-- test one. It should be a little soft but still have some crunch. This is a key texture to me. When they are ready, strain and place in  ice water to immediately stop the cooking. You can let them hang out there if you are doing something else.

Toasting: Place the pine nuts on a cooking sheet (I do this in my toaster oven). Preheat to 350. Cook the nuts for 5 minutes and then turn off the oven heat. Let them sit until they are quite fragrant, checking them often, about 10-12 minutes.

Dressing: Combine oil, vinegar and cashews. Whiz in your blender (love the bullet!) until completely smooth. Watch out for chunks. While they're sometimes fun, for this salad, not so much. Once smooth, add the dijon, honey, garlic, stevia, salt, and pepper. Whiz again. Finally, add the sparkling water and stir with a spoon (to keep some of the bubbles).


Salad: Drain, dry and chop the green beans into 1 inch pieces and combine in a salad bowl with the cannellini beans and chickpeas. Add the arugula and pine nuts and mix these ingredients together. Toss lightly with the dressing, trying not to break up the cannellini beans too much. I like to re-chill this one for 15-20 minutes before I serve it, but Mr. Batali suggests letting it sit at room temperature. I think chill enhances that nice crunchy texture of the blanched green beans...but he says the room temp makes the flavors in the beans and dressing more punchy. Up to you, I suppose!

5.08.2013

Quinoa Tacos


So, in the name of a good cause, my friend Sarah offered to participate in her work team's fundraising project, a taco lunch for about 250-300 employees of her company. She told me about this weeks ago, and apparently the planners were rolling along with a completely meat-based menu. Thoughtful Sarah spoke up and mentioned that at least 20 percent of that group could, potentially, be vegetarian or vegan, and would (obviously) prefer a non-meat option. I'm so proud! Sarah, being a fine meat-eater herself (one of the low-carb variety, even), still thinks of others-- what a great friend. She offered to provide the vegan option for the event, planning to serve up to 70 people.

When she texted three weeks later to remind me that she needed my recipe for fabulous vegan tacos, I was reminded of the affair and inspired to help her chef it up (as my friend Mich and I like to say). I sent her a recipe, she picked up the goods, and we cooked for a crowd at my place. It was great fun.

After I sent the recipe to Sarah, I was reminded (by her, sort of) that the original recipe I wanted to send was from Appetite for Reduction, a taco recipe with black beans, zucchini and black olives. This recipe is really fantastic...but the one we made was just as good, I think, though more traditional without the olives and without the amazing garlic-yogurt sauce that accompanies the dish. With that in mind, I learned a couple things during this project about cooking for the masses:

  • Simplicity does have a place!
  • If it is close to the same recipe for each batch, it will all pan out in the vat-o-food
  • Not everyone likes jalapeno as much as me...
  • While fresh and homemade is always my preference...taco seasoning really can get the job done in a pinch!
In any case, we had a great time cooking together. Here's what we made. I figure this recipe serves around 10 people 2 tacos each...maybe a little more, depending on the crowd.


1T Olive Oil (or slightly less, if you prefer)
1 c. diced onion
1 T minced garlic
1-2 T finely chopped jalapeno
2 c. chopped mushroom
1 c. small dice zucchini
2 big handfuls of fresh spinach (2-3 cups)
1/2 of a 16 oz can black beans
2 cups cooked quinoa
1 packet of taco seasoning or 2-3 T. of seasoning blend below

Heat the olive oil over medium high heat in a skillet. Once hot, add the onion. After the onions begin to look translucent (3 minutes or so), add the jalapeno and garlic. Saute for another minute or so, until it's all very fragrant (sniff it!). Add the mushrooms to the pan. Stir and toss a bit. Let cook until the mushrooms begin to release their liquid. At this moment, add the zucchini and stir. Let it all cook until the zucchini is tender and the mushrooms are totally cooked down, 4 minutes or so, I think. At this point, add the spinach and toss until it wilts a bit. This shouldn't take more than 3-5 minutes, likely on the lower end of that. Once the spinach seems to be wilted or nearly there, add the quinoa and beans. Stir until everything is pretty well combined and reduce the heat slightly if you haven't already.

At this point, you've hopefully decided whether you'll take the easy or more challenging (not really) route. If you bought a package of taco seasoning, add it along with 1 c. water and stir until all of the filling is coated, the sauce/spice evenly distributed and the liquid absorbed. 

If you want to make a taco seasoning from the spices in your cabinet, which I recommend, mix the following together before you begin cooking: 

2 t. cumin
2 t. chili powder
1 t. ground coriander
1 t. oregano
1 t. garlic powder
2 t. dried onion or 1 t. onion powder
2 t cornstarch or arrowroot (optional, I think...)
1/4-1/2 t. cayenne
1 t. paprika
1 t. salt


This recipe may be slightly more than you need for this recipe...but add as you see fit, starting with 2 tablespoons of the mix and adding more if needed after you mix the first dose in.

Once you're finished, this taco filling is ready to go. Enjoy and please-- for the love of Pete-- serve your tacos with fresh avocado. It's the only way to go! Enjoy...

5.04.2013

Old Recipes Die Hard

It's been a 3-years long quest for the best vegan mac and cheese recipes. I've probably tried something like 20 different recipes, I'd guess...maybe more. The reason it might not be more, however, is because the first recipe I tried was so good. I don't think I've made that recipe in more than 6 months because I've been trying all these others and have found a couple winners...but today for lunch, I went back to my old standard from Vegan Yum Yum. This recipe has all the important qualities of good vegan mac:
  • creamy and rich 
  • tangy and cheezy
  • thick and well textured

This recipe has all these things, and to make it even better, I usually have ALL the ingredients on hand to make it. Very handy. Not all the best rich foods have tons of butter and cream in them. It's just not true. Aside from the mac and cheese at Local Kitchen, I haven't found a "real" mac that beats the vegan ones I love to make at home. For all you cheese lovers out there, it's not just the cheese that makes life delicious! It's a special combination, I think...the rich, tangy, saltiness of the sauce, the softness of the noodles, the warmth of the dish altogether. Cheese isn't the only tang, and cream isn't the only rich. It's a wonder, but it's true. 


Here's the recipe from VeganYumYum.com:

Mac and Cheeze
Serves 2-3

1/3 Cup Earth Balance Margarine
1/4 Cup All Purpose Flour
2 1/2 Tbs Low Sodium Tamari or Soy Sauce
1 Tbs Lemon Juice, fresh
1 Tbs Sweet/White/Mellow Miso
1 Tbs Tahini
1 Tbs Tomato Paste (not sauce!)
1 1/4 Cup Soy Milk
1/3 Cup Nutritional Yeast
1 Pinch Salt
Black Pepper, to taste

Melt the margarine over medium/medium high, add flour to make a roux. Let it cook for a minute or two, until fragrant, stirring constantly. Add the Tamari, lemon juice, miso, tahini, tomato paste, and mix up until combined. Add part of the milk and cream it with the other ingredients. Then add the remaining milk. Add the yeast, bring to a light boil, stirring constantly. It should be thickened by this point, and you can take it off the heat.

I usually reduce the margarine quite a bit, maybe 2-3 tablespoons, and it doesn't change the awesomeness. I've also swapped out the tomato paste for Ketchup when I don't have any on hand. I do not add salt. Be creative, I suppose. Pour this sauce, when finished, over 3 cups of cooked rice noodles, spirals or elbows. You can then bake it for 15-20 minutes at 375, topped with breadcrumbs, for super awesomeness.

5.01.2013

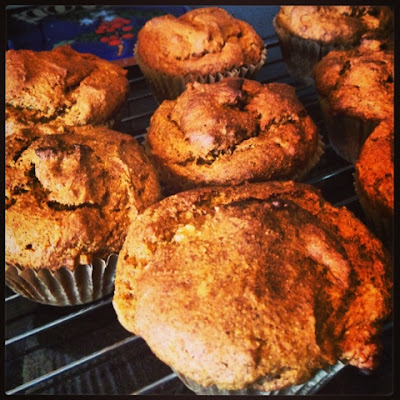
Sweet potato, 5-spice muffins

I made these muffins today from It's All Good. They are a wonderful option for the celiac and gluten-free inclined among us. Sweet enough, super moist and uber flavorful, I ate one for breakfast and one for lunch. So much for a varied diet! :-/


So the gist here is using the sweetness and moisture of a roasted sweet potato mixed with a standard GF mix and maple syrup, resulting in an excellent crumb/texture and a great taste, thanks to the 5-spice mixture. Usually, GF pastries are pretty heavy and hardened, in my experience. These muffins are neither of these things. They are delightful. When they're warm, they're great...they're also good with a light swipe of Earth Balance. Light enough for a snack, there are something I'll likely make again.